LED Light Strip Hacked for Haptic Motors

Last week I got to talk at about my most recent hack, a flexible haptic strip that easy for anyone to use, at Hack N Tell Round 25 in NYC.
In between working for ASU's Cubic lab on a new haptic strip, I was pondering ways to bring haptics more to the forefront. Sure you can buy a bare motor or lilypad motor from Sparkfun or elsewhere, but in practice they're a total pain to get working. You need a transistor and its a pain to mount them anywhere you'd want them -- Especially when motors are only really fun when you have a few of them to play with. And lets not even address the cost of say 10 of these modules!
Then it hit me that the cheapest motor driver chip I could buy would be the <14cent WS28XX series LED drivers that get used on LED light strips!
Now, it's not necessarily THAT novel to use LED drivers to drive motors. Many people, including myself, have done it before, but I realized theres no reason I couldn't use the same flex PCB process as LED strips as a form factor as well.
I don't yet know how to do flex PCB, and theres is no OSHPark for flex PCB yet :) (paging laen) So I just found an LED strip on ebay that used a common driver chip I liked, that wasn't integrated into the LED which is really common nowadays, and wasnt potted with epoxy or anything.
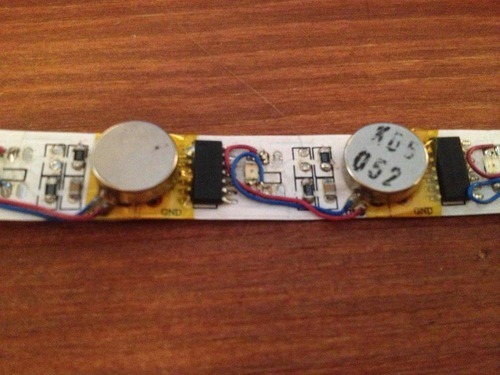
The strips don't need many changes for motors. Just pulled the LEDs off and put a motor across one of the 3 channels, top to bottom. You can also add a little LED across one of these channels as well to get visual notification. Finally you'll want to use a multimeter to figure out which resistor hooks up to the motor so you can swap that resistor off for a shunt--You'll want as much current as the driver chip can give you. In the future you may want to add some motor protection with a flyback Schottky diode across where you put the motor to protect the LED driver chip.
The additional beauty is theres already a great Arduino library called fastSPI to run these! Just follow the directions for LED light strips. SCK to Pin 13, SDA to Pin 11. They should work on 3v or 5v but I've been running mine at 3v with more wearable Arduinos like the Xadow and Fio V3.
And just like LEDs you can simply cut the strip anywhere you want, from 1 motor to 32, your choice!
We've tried them in baseball caps and arms and legs. I think they'd work well sewn into a bag strap. Let me know what form factor you try! And hopefully in the future I'll be able to get them produced for cheaper than hacking them from ebay :)