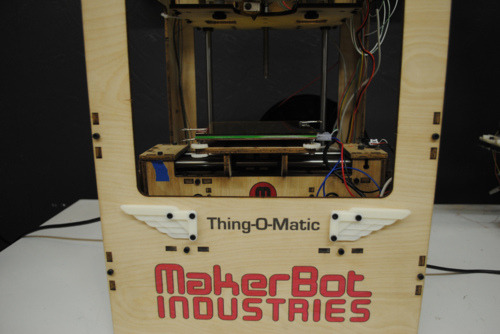
Top 10 Makerbot/Rep Rap Upgrades and Tips
6 minute read
13 December 2011

We’ve been printing for 2 years now at HeatSync and I thought I’d put together some of my top tips for new printer owners. Some of them are hard won, others are from other bloggers in the Rep Rap/Makerbot community over the years so as such I’ll take no credit for any of these innovations.
- If you’re not on a stepper driven extruder like the MK6 or MK7, it is time to upgrade. All of the innovation in 3D printing is happening in stepper extruders. With the control they provide we can finally alter extrusion speed which fixes all SORTS of problems from first layer curling to ooze and ‘towers.’ The MK7 has amazing resolution but doubles the print time of the MK6 so decide if you need fine quality or speed.
- Forget about the conveyer belt on your fancy new Thing-o-matic. It a great idea, and will mature eventually, but current design is a big problem for prints of any decent size. First, it is just a 'squishy’ surface to print on. You want a really firm surface to push plastic onto to get your first layer started so your print sticks all the way through your marathon prints. Secondly, the tension curls the belt along the y axis which will further ruin prints. Like the optimized Thing-o-matic build instructions recommend, Buy Makerbot’s aluminum build surface.
- Further, don’t just print on your aluminum platform with Kapton on top of it as suggested. You dont wan’t to be prying prints off that platform, putting stress on your Y stage! Nor do you want to wait 10 minutes for your platform to cool off to get your part off so you can wait 5 minutes for the build surface to get back up to temperature! Use Kapton covered glass on top of your aluminum surface, held down by document clips! Now you can quickly swap out your finished part with another piece of glass and let it cool until you can crack your print off AND your machine will stay at temperature between prints! (Glass can be had at Ace hardware cut to whatever size you want for like .40 each!)
- Now, how do you get that damn sticky expensive Kapton tape onto the build platform without bubbles? Cut your piece of Kapton out and put soapy water on the sticky side! Now you’ll be able to reposition the film over and over again until it dries. Use a credit card to squeegee out the film evenly and you’ll have an amazing build surface with no bubbles.
- Print platform leveling thumbscrews. You need to be able to level your print surface quickly and occasionally on the fly. I’ve saved many prints by watching the first layer and adjusting my bed with the thumb screws. In order to get the nuts into the plastic, heat them up with a lighter or torch or something and they’ll slide and stick into their place perfectly.
- OK, one more build platform tip :) If you’re STILL getting first layer curling, scrub your platform down with acetone. However, BE CAREFUL! Acetone really opens the pores on the Kapton and I’ve had prints stick so well I had to break the glass to get them off!
- Print spool holders. Filament is notorious for getting all tangled up 2 hours into your 3 hour print. You can’t print long term without a good system for your filament to unwind. You may also need to look into filament guides to keep the filament unwinding smoothly.
- Leave a usb cable INSIDE your Thing-o-matic attached to the extruder controller. The LAST thing you want to do is to open up your whole machine every time a firmware upgrade is released.
- Buy more plastic in more colors! I love Makerbot, so feel free to support them by buying their filament. However they’re often they’re out of what I want or don’t have the colors I need. We’ve been using 3D Printer Stufffor filament purchases for the past few months and have been quite happy so far we have been having trouble lately with no response from them yet! We’re looking for a new vendor now.
- Get into the community! All these tips came from watching the 3D printing blogs and forums. No matter which 3D printer you have, make sure to check the Thingiverse, Makerbot and Rep Rap blogs often. Also follow the Makerbot Google Groups and the Rep Rap Forums for great advice from DIY 3D printing pros.